
Nothing says “I love you” like a homemade chocolate cake—especially when it’s this rich, moist, and downright dreamy. I’ve been making this Valentine’s Day cake for years, and trust me, the way the cocoa melts into that velvety crumb? Pure magic. Whether it’s for your sweetheart, Galentine’s pals, or just treating yourself (no judgment here!), this is the kind of dessert that makes any day feel special. Pro tip: The secret’s in that cup of boiling water—it sounds crazy, but it gives the cake its unbelievable tenderness. Now let’s bake some love!
Valentine Cake Ingredients
Gather these simple ingredients—I promise, you probably have most of them already! Just make sure everything’s at room temperature (except the boiling water, obviously) for the smoothest batter. Here’s what you’ll need:
- 2 cups all-purpose flour (spooned & leveled—don’t pack it!)
- 1 1/2 cups granulated sugar
- 3/4 cup cocoa powder (sift it if it’s lumpy—trust me, it makes a difference)
- 1 1/2 tsp baking powder
- 1 1/2 tsp baking soda
- 1 tsp salt (I use kosher, but table salt works too)
- 2 large eggs (straight from the fridge? Pop them in warm water for 5 minutes)
- 1 cup milk (whole milk gives the richest texture, but any kind works)
- 1/2 cup vegetable oil (or melted coconut oil for a hint of flavor)
- 2 tsp pure vanilla extract (the good stuff—no imitation here!)
- 1 cup boiling water (yes, really—it’ll make your cake unbelievably moist)
Frosting Ingredients
Now for the fluffy, dreamy part! This buttercream is like a sweet hug for your cake. Want to make it extra Valentine-y? Add a few drops of red food coloring—I like gel colors because they don’t water down the frosting.
- 1 cup (2 sticks) unsalted butter, softened (not melted—just soft enough to leave a fingerprint when pressed)
- 4 cups powdered sugar (sifted if it’s clumpy)
- 2-3 tbsp milk (add slowly—you can always add more)
- 1 tsp vanilla extract
- Red food coloring (optional, but so fun for hearts or swirls)
Psst—if you’re feeling fancy, grab some fresh strawberries or edible rose petals for decorating. They look gorgeous and taste even better!
How to Make Valentine Cake
Okay, let’s get baking! Don’t be startled when the batter looks super thin—that’s exactly how it should be. Just follow these steps, and you’ll have the most tender, chocolatey cake in no time.
- Preheat your oven to 350°F (175°C). Grease two 9-inch round cake pans with butter or nonstick spray, then dust with flour (or use parchment rounds for foolproof removal).
- Whisk the dry ingredients. In a large bowl, mix the flour, sugar, cocoa powder, baking powder, baking soda, and salt. Break up any cocoa lumps with your whisk—this ensures a smooth batter.
- Add the wet ingredients. Toss in the eggs, milk, oil, and vanilla. Beat with a hand mixer (or stand mixer) on medium speed for exactly 2 minutes. Set a timer! Overmixing = tough cake, and we want pillowy-soft.
- Pour in the boiling water. Yes, it’ll look alarmingly liquidy—that’s normal! Stir gently with a spatula until just combined. The batter will be thin, like heavy cream.
- Divide and bake. Pour evenly into your prepared pans. Bake for 30-35 minutes. The cakes are done when a toothpick poked in the center comes out with just a few moist crumbs (no wet batter).
- Cool properly. Let cakes rest in pans for 10 minutes—this prevents crumbling. Then, flip onto wire racks to cool completely. No cheating here! Frosting a warm cake = melty disaster.
Preparing the Frosting
While the cakes cool, make that luscious frosting. Here’s how to get it silky-smooth:
- Cream the butter. Beat softened butter in a bowl for 1-2 minutes until pale and fluffy. Scrape the bowl often—no one likes lumpy frosting!
- Add powdered sugar gradually. Dump in 1 cup at a time, mixing on low speed first (unless you want a sugar blizzard in your kitchen). Then beat on high for 2 minutes after each addition.
- Adjust consistency. Pour in milk 1 tbsp at a time until it’s spreadable but still holds peaks. Stir in vanilla. For pink frosting, add red food coloring drop by drop until it’s your perfect Valentine hue.
Decorating the Cake
This is where the romance happens! Here are my favorite ways to make it swoon-worthy:
- Layer it up: Place one cake layer on a plate, spread with ¾ cup frosting, then top with the second layer. Frost the top and sides with the rest—don’t stress about perfection. Rustic looks charming!
- Piped hearts: Fill a piping bag (or ziplock with a corner snipped) with reserved pink frosting. Pipe little hearts around the edges or write “XOXO” on top.
- Fresh flair: Top with halved strawberries, raspberries, or even rose petals (food-safe ones!). A dusting of cocoa powder or sprinkles adds whimsy.
- Pro tip: If frosting sticks to crumbs, do a “crumb coat”—a thin layer first, chill for 15 minutes, then add the final coat for a flawless finish.
Now step back and admire your masterpiece! This cake is best enjoyed with someone you love… or just a big fork and zero sharing.
Why You’ll Love This Valentine Cake
Oh my goodness, where do I even start? This cake is basically a chocolate hug—it’s that good. Here’s why you’ll be obsessed (and why I make it every single Valentine’s Day without fail):
- Moist like a dream: That boiling water trick? It’s pure wizardry. Your cake stays tender for days—no sad, dry slices here!
- Chocolate that actually tastes like chocolate: None of that weak cocoa flavor. This one’s rich, deep, and downright addictive. (I may or may not lick the bowl.)
- Foolproof frosting: Even if you’ve never piped a rose in your life, this buttercream is forgiving and oh-so-fluffy. Add more milk if it’s stiff, more sugar if it’s loose—you literally can’t mess it up.
- Customizable as heck: Pink frosting? Sure! Heart sprinkles? Go wild! Swap the filling for raspberry jam or add a layer of ganache. Make it yours!
- Looks fancy, secretly easy: That two-layer beauty screams “I slaved all day,” but we know the truth—it comes together in under an hour. Your secret’s safe with me.
- Perfect for sharing (or not): Split it with your sweetheart, bring it to Galentine’s brunch, or—no shame—eat it solo in pajamas. Zero judgment zone.
- Better than any store-bought cake: Homemade love beats bakery prices any day. Plus, imagine the bragging rights when everyone asks for the recipe!
Seriously, one bite of that melt-in-your-mouth crumb with that cloud-like frosting? You’ll be making this every February (and let’s be real… probably every month).
Tips for the Perfect Valentine Cake
After making this cake more times than I can count (and yes, learning from my own mistakes!), here are my hard-earned secrets to cake success. Follow these, and you’ll avoid the usual pitfalls—no sad, sunken cakes allowed!
- Don’t overmix the batter: Once you add the boiling water, stir just until combined. Overmixing = tough cake, and we want that tender crumb. A few lumps? Totally fine!
- Test for doneness early: Ovens vary, so start checking at 30 minutes. The toothpick should have a few moist crumbs—not wet batter, but not bone-dry either. Underbaked cake collapses; overbaked cake turns into chocolate sawdust.
- Let cakes cool completely: I know it’s tempting to frost right away, but warm cake melts frosting into a sad puddle. Wait at least 1 hour—use the time to clean up or sneak a spoonful of frosting (I won’t tell).
- Sift your cocoa powder: Especially if it’s been sitting in the pantry awhile. Cocoa loves to clump, and no one wants gritty cake. A quick sift makes it velvety smooth.
- Room temp ingredients matter: Cold eggs or milk can make the batter seize up. If you forgot to take them out early, place eggs in warm water for 5 minutes and microwave milk for 10 seconds.
- Grease pans like a pro: Butter + flour is my go-to, but a parchment paper round on the bottom guarantees your cake won’t stick. Peeling off that paper to reveal a perfect cake? Chef’s kiss.
- Rotate pans halfway through baking: If your oven has hot spots (most do!), swap the pans’ positions at the 15-minute mark for even baking.
- Frosting too soft? Chill it for 15 minutes before decorating. Too stiff? Add milk ½ tsp at a time. Buttercream is forgiving—just tweak as needed!
And my golden rule? Have fun! So what if your frosting isn’t bakery-perfect? Lopsided cakes taste just as delicious—probably better, because they’re made with love.
Valentine Cake Variations
Listen, I love this classic version—but sometimes you wanna mix things up! Here are my favorite twists to keep your Valentine cake exciting. Whether you’re catering to dietary needs or just feeling adventurous, these ideas are total game-changers.
- Gluten-free magic: Swap the all-purpose flour for a 1:1 gluten-free baking blend (I like Bob’s Red Mill). Works like a charm—just don’t skip the xanthan gum if your blend doesn’t include it!
- Dairy-free delight: Use almond milk or oat milk instead of regular milk, and coconut oil instead of butter in the frosting. Pro tip: Earth Balance buttery sticks make killer dairy-free frosting.
- Raspberry romance: Spread a thin layer of seedless raspberry jam between the cake layers before frosting. The tart-sweet combo with chocolate? *Chef’s kiss*
- Espresso boost: Add 1 tbsp instant espresso powder to the dry ingredients. It deepens the chocolate flavor without tasting like coffee—just richer, bolder love.
- Minty fresh: Swap the vanilla in the frosting for peppermint extract (start with ½ tsp—it’s strong!). Top with crushed candy canes for a festive vibe.
- Nutty crunch: Fold ½ cup chopped toasted hazelnuts or pecans into the batter. Or sprinkle them between layers for a surprise crunch.
- Orange zest twist: Add 1 tbsp orange zest to the batter and ½ tsp orange extract to the frosting. Chocolate + orange = Valentine’s Day royalty.
- Cupcake cuties: Pour the batter into lined muffin tins and bake for 18-20 minutes. Perfect for gifting—just pipe on mini frosting swirls!
See? Endless ways to make this cake your own. My personal favorite? The raspberry jam version—it’s like a chocolate-covered strawberry in cake form. *Swoon*
Storing and Serving Valentine Cake
Okay, let’s talk about keeping this beauty fresh—because let’s be real, you might not finish it all in one sitting (though I wouldn’t blame you if you tried!). Here’s how to store it like a pro and serve it up with flair:
- Room temp short-term: If you’re eating it within 2 days, just cover the cake with a cake dome or inverted bowl. No fridge needed—cold temps dry it out!
- Fridge for longer: Got leftovers beyond 2 days? Pop it in the fridge in an airtight container for up to 5 days. Let slices come to room temp before serving—cold cake is sad cake.
- Freeze like a boss: Wrap unfrosted cake layers tightly in plastic wrap, then foil, and freeze for up to 3 months. Thaw overnight in the fridge before frosting. Already frosted? Freeze slices on a tray first, then wrap individually—perfect for midnight cravings!
- Serving suggestions: Pair slices with hot coffee (the bitterness cuts the sweetness perfectly) or a glass of red wine for ultimate romance. A scoop of vanilla ice cream? Yes, please—it’s Valentine’s Day, after all!
- Revive stale cake: If it dries out (unlikely, but happens), microwave a slice for 10 seconds—it’ll taste freshly baked again. Magic!
Pro tip: If you’re transporting it, chill the frosted cake for 30 minutes first—it’ll stay picture-perfect. And hey, if you “accidentally” eat half the cake straight from the fridge with a fork… well, some secrets are best kept between us.
Nutritional Information
Okay, let’s be real—this is a treat, not a salad (and thank goodness for that!). But in case you’re curious, here’s the scoop on what’s in each dreamy slice. Just remember, these numbers are estimates—actual values can vary based on your exact ingredients and how generously you frost! Pro tip: Sharing a slice = half the calories… or so I tell myself.
- Serving Size: 1 slice (1/12 of the cake)
- Calories: 350 (worth every single one!)
- Sugar: 40g (it’s Valentine’s Day—live a little!)
- Sodium: 300mg
- Fat: 15g (but hey, it includes butter—aka happiness in solid form)
- Saturated Fat: 6g
- Carbohydrates: 55g (mostly from that luscious frosting cloud)
- Fiber: 2g (thanks, cocoa!)
- Protein: 4g (eggs FTW)
- Cholesterol: 45mg
Disclaimer: Nutritional info is calculated using standard ingredients, but brands and substitutions can change things. If you’re tracking closely, always check your specific products. Now go enjoy that cake—love (and dessert!) isn’t about numbers anyway!
Frequently Asked Questions
I’ve gotten so many sweet questions about this cake over the years—here are the ones that pop up most often! (And hey, if you’ve got a question I didn’t cover, shout it in the comments—I’ll answer ASAP!)
Can I make cupcakes instead of a layer cake?
Absolutely! Pour the batter into lined muffin tins (fill each cup ⅔ full) and bake for 18-20 minutes. Same deliciousness, just in adorable, shareable portions. Perfect for classroom treats or office parties!
How do I prevent my cake from drying out?
Two secrets: 1) Don’t overbake—pull it out when the toothpick has moist crumbs, not when it’s totally clean. 2) Store it properly! Room temp under a cake dome is best for short-term; fridge (wrapped tight) for longer. That boiling water keeps it moist for days—trust the process!
What’s the best frosting for beginners?
This buttercream is foolproof—but if you’re nervous, start with a whipped cream frosting (just heavy cream + powdered sugar beaten to stiff peaks). It’s lighter and harder to overmix. Or cheat with store-bought frosting jazzed up with extra vanilla or cocoa powder!
Can I make this cake ahead of time?
Totally! Bake the layers up to 2 days in advance—wrap them tightly in plastic once cooled and store at room temp. Frost the day you’re serving. Or freeze the unfrosted layers for up to 3 months (thaw overnight in the fridge).
Why did my cake sink in the middle?
Usually means it needed a few more minutes in the oven (the center wasn’t fully set) or you opened the door too early—resist peeking before 25 minutes! Also, check your baking powder/soda isn’t expired. But hey, sunken cake still tastes amazing—just pile on extra frosting to disguise it!
Share Your Valentine Cake Creations
Okay, I need to see your gorgeous cakes—because nothing makes me happier than spotting your kitchen triumphs on my feed! Did you add rainbow sprinkles? Swirl in caramel? Maybe even attempt a heart-shaped drip? (Brave soul—I salute you!) Snap a pic and tag me @[YourHandle] so I can cheer you on. Baking is always better together, and who knows—your masterpiece might just inspire someone else to whip up their own love-filled dessert. Pro tip: Nighttime kitchen lighting got your cake looking blah? Natural light by a window + a quick sprinkle of powdered sugar makes everything Instagram-worthy. Now go forth and bake… then brag! *wink*
Print
Irresistible Valentine Cake Recipe for 2 Sweethearts
- Total Time: 55 minutes
- Yield: 12 servings 1x
- Diet: Vegetarian
Description
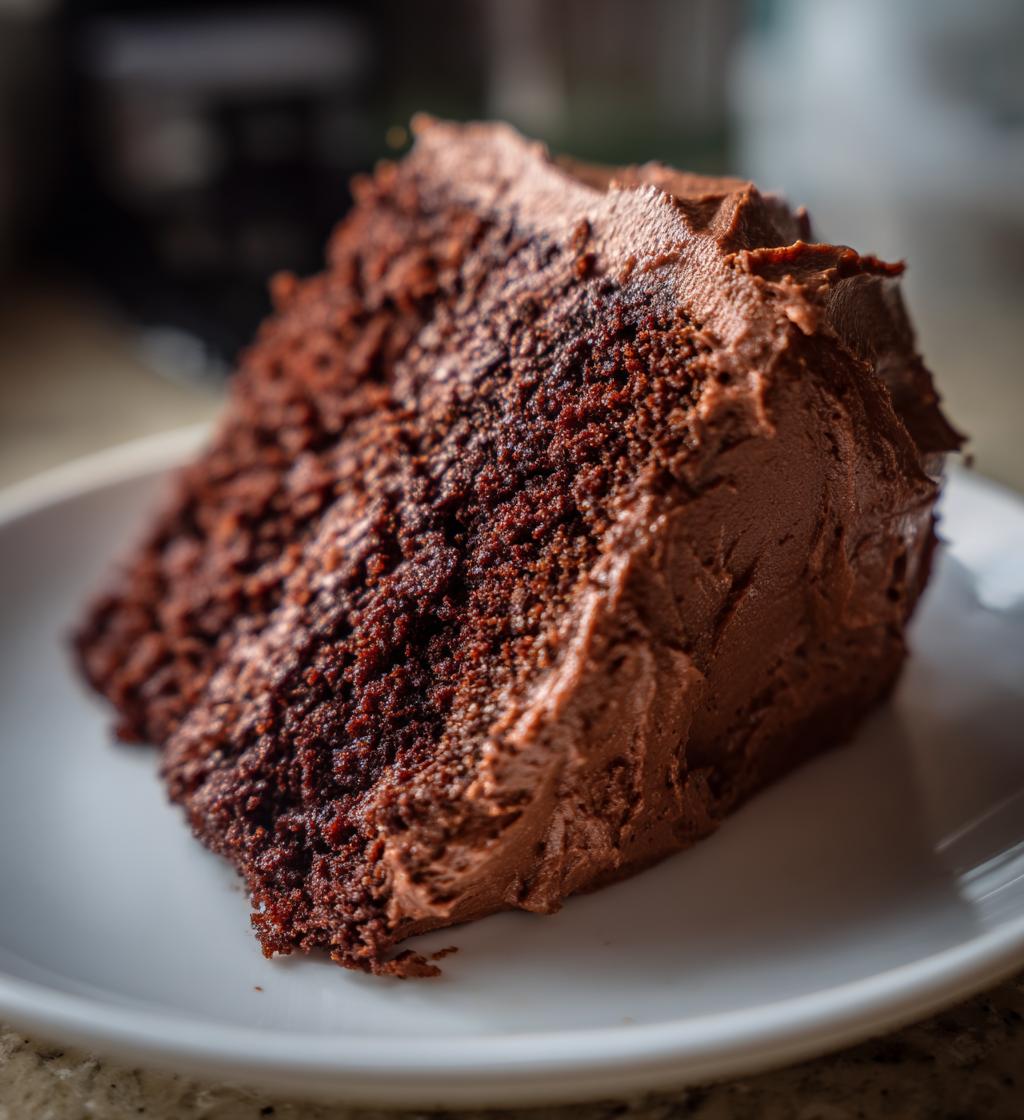
A delicious and romantic Valentine’s Day cake perfect for celebrating with your loved one. This cake is moist, flavorful, and beautifully decorated.
Ingredients
- 2 cups all-purpose flour
- 1 1/2 cups granulated sugar
- 3/4 cup cocoa powder
- 1 1/2 tsp baking powder
- 1 1/2 tsp baking soda
- 1 tsp salt
- 2 eggs
- 1 cup milk
- 1/2 cup vegetable oil
- 2 tsp vanilla extract
- 1 cup boiling water
- 1 cup butter (for frosting)
- 4 cups powdered sugar (for frosting)
- 2–3 tbsp milk (for frosting)
- 1 tsp vanilla extract (for frosting)
- Red food coloring (optional, for decoration)
Instructions
- Preheat oven to 350°F (175°C). Grease and flour two 9-inch round cake pans.
- In a large bowl, mix flour, sugar, cocoa, baking powder, baking soda, and salt.
- Add eggs, milk, oil, and vanilla. Beat on medium speed for 2 minutes.
- Stir in boiling water. The batter will be thin.
- Pour batter evenly into prepared pans.
- Bake for 30-35 minutes or until a toothpick inserted in the center comes out clean.
- Cool in pans for 10 minutes, then remove to wire racks to cool completely.
- For the frosting, beat butter until creamy. Gradually add powdered sugar, milk, and vanilla.
- Once cakes are cooled, frost the top of one layer, place the second layer on top, and frost the entire cake.
- Add red food coloring to some frosting for decorative accents if desired.
Notes
- For a richer chocolate flavor, use dark cocoa powder.
- Ensure cakes are completely cooled before frosting to prevent melting.
- Decorate with fresh strawberries or edible flowers for extra romance.
- Prep Time: 20 minutes
- Cook Time: 35 minutes
- Category: Dessert
- Method: Baking
- Cuisine: American
Nutrition
- Serving Size: 1 slice
- Calories: 350
- Sugar: 40g
- Sodium: 300mg
- Fat: 15g
- Saturated Fat: 6g
- Unsaturated Fat: 7g
- Trans Fat: 0g
- Carbohydrates: 55g
- Fiber: 2g
- Protein: 4g
- Cholesterol: 45mg
Keywords: valentine cake, chocolate cake, romantic dessert, homemade cake