
You know what I love about sushi? It’s not just delicious—it’s way easier to make at home than you might think! I used to think sushi was only for fancy restaurants until I tried rolling my own one lazy Sunday. Now? I’m hooked! There’s something magical about transforming simple ingredients like fresh fish, creamy avocado, and crisp cucumber into those perfect little rolls. And trust me, once you get the hang of it (even if your first attempts aren’t picture-perfect), you’ll be amazed at how fun and rewarding homemade sushi can be. Let me show you my no-stress approach to making restaurant-quality sushi right in your own kitchen!
Ingredients for Homemade Sushi
Okay, let’s gather everything you’ll need! The beauty of sushi is that the ingredient list is actually pretty simple—most items you might already have or can find easily. I like to lay everything out before starting because once that rice is ready, you’ll want to move quick! Here’s what you’ll need:
- 2 cups sushi rice (trust me, regular rice won’t give you that perfect sticky texture)
- 2 cups water (for cooking the rice—I use filtered if I have it)
- 1/4 cup rice vinegar (this is key for that authentic sushi flavor)
- 1 tbsp sugar (balances the vinegar’s tang perfectly)
- 1 tsp salt (just a pinch makes all the difference)
- 4 sheets nori (the seaweed wraps—look for the roasted kind)
- 1 avocado, sliced (make sure it’s just ripe—not too mushy!)
- 1 cucumber, julienned (I peel mine first for extra crispness)
- 200g fresh salmon or tuna, sliced (sushi-grade is a must—ask your fishmonger)
- 1 tbsp wasabi (for that nose-tingling kick)
- 1/4 cup soy sauce (I prefer low-sodium for dipping)
See? Nothing too crazy! Pro tip: If you can’t find sushi rice, short-grain rice will work in a pinch, but the texture won’t be quite the same. And don’t skip the rice vinegar—it’s what makes the rice taste like real sushi!
How to Make Sushi Step by Step
Preparing the Sushi Rice
Alright, let’s start with the heart of sushi—the rice! First, rinse your sushi rice in a fine-mesh strainer under cold water until the water runs clear. This removes excess starch so your rice isn’t gummy. I usually swirl it with my fingers—it’s oddly satisfying! Then, cook it with the water either in a rice cooker (my lazy favorite) or a pot with a tight lid for about 20 minutes.
While that’s cooking, mix your rice vinegar, sugar, and salt in a small bowl until dissolved. When the rice is done, transfer it to a wide, non-metallic bowl (wood is traditional!) and gently fold in the vinegar mixture with a rice paddle or spatula. Fan the rice as you mix—this helps it cool faster and gives it that perfect glossy shine. Let it cool to room temperature before rolling—patience is key here!
Assembling and Rolling the Sushi
Now the fun part! Place a bamboo mat on your counter with a sheet of plastic wrap on top (trust me, this makes cleanup way easier). Lay a nori sheet shiny-side down on the mat. Wet your hands (this prevents sticking!) and grab a handful of rice, spreading it evenly over the nori, leaving about an inch bare at the top.
Arrange your fillings horizontally about a third of the way up—I like avocado first, then cucumber, then fish. Don’t overstuff, or you’ll have a sushi burrito instead! Here’s the trick: lift the edge of the mat closest to you, tuck it over the fillings, then roll forward while applying gentle pressure. It should feel like giving your sushi a little hug. Give it a firm squeeze along the length to seal the deal.
Cutting and Serving Sushi
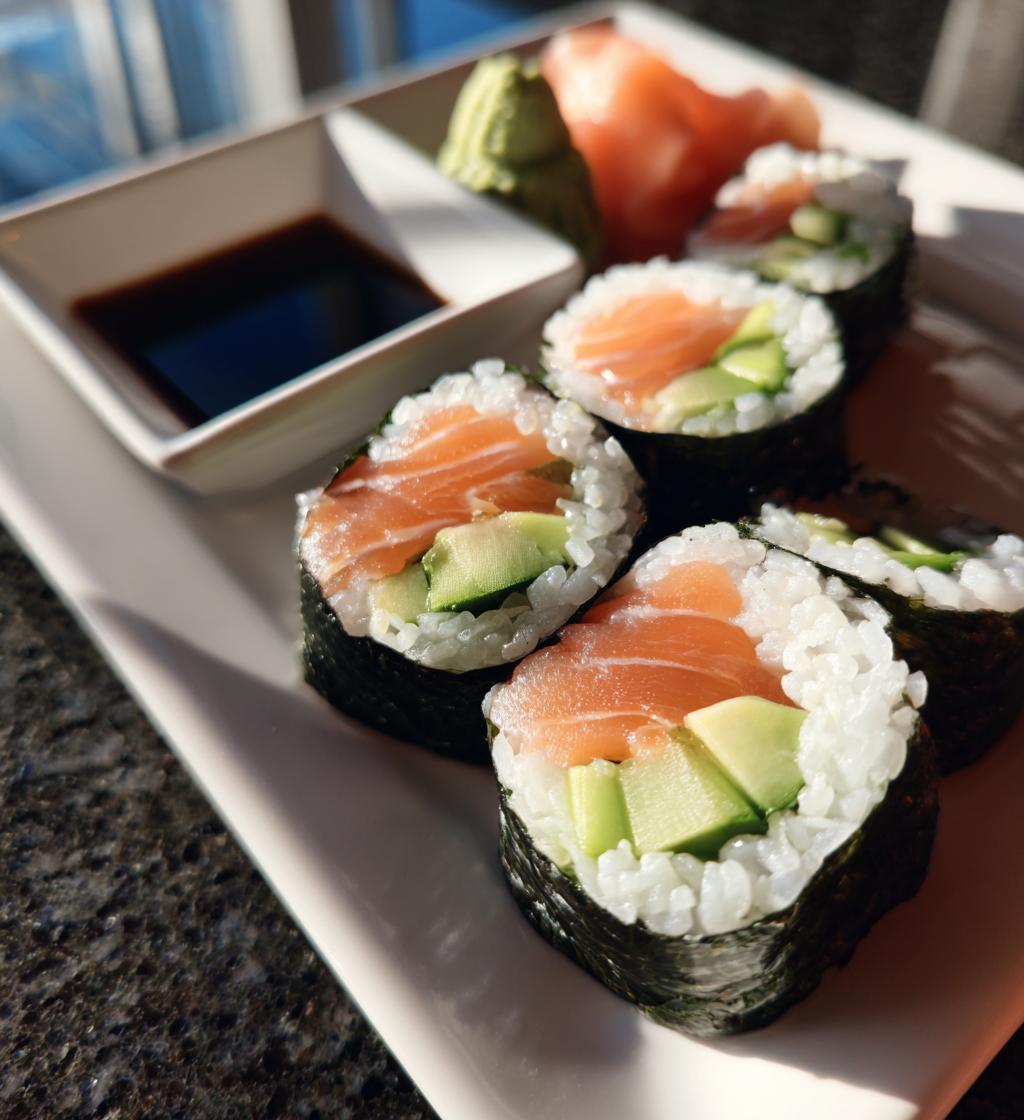
Grab your sharpest knife (a dull one will smash your beautiful roll!) and wet the blade slightly. Cut the roll in half first, then cut each half into 3-4 pieces. Wipe the knife between cuts for clean slices. Arrange them on a plate with the cut sides up—show off those colorful layers!
Serve immediately with small dishes of soy sauce, wasabi (mix a pea-sized amount into your soy sauce if you’re brave!), and pickled ginger for palate cleansing. I love adding a little bowl of miso soup on the side—it makes the whole meal feel extra special.
Tips for Perfect Sushi
Okay, let me share my hard-earned sushi wisdom! First, always keep a bowl of water nearby to wet your hands—sticky rice is no joke, and this simple trick saves so much frustration. When choosing fish, splurge on sushi-grade from a reputable source (I learned this the hard way after a sketchy grocery store purchase). Another game-changer? Slice your fillings thin—thick chunks make rolling impossible. And don’t press too hard when rolling—firm but gentle gets you those tight, pretty spirals. Lastly, if your first roll looks messy, don’t stress! Mine did too, and now I can roll with my eyes closed (almost).
Sushi Variations to Try
Once you’ve mastered the basics, the fun really begins! Here are some of my favorite twists to keep things exciting:
- Vegetarian Delight: Skip the fish and load up with mango, bell peppers, and cream cheese for a sweet-creamy combo
- Spicy Tuna: Mix diced tuna with sriracha mayo—so addictive!
- Rainbow Roll: Top your roll with thin slices of avocado, tuna, and salmon for a colorful showstopper
- Tempura Crunch: Add crispy tempura flakes inside or on top for texture
- California Dreamin’: Crab stick, avocado, and cucumber—a classic for a reason
- Inside-Out Roll: Rice on the outside with sesame seeds pressed in—perfect for beginners
Don’t be afraid to experiment! Some of my best rolls came from “what if I try this?” moments. The beauty of sushi is how endlessly customizable it is.
Serving Suggestions for Sushi
You’ve rolled your masterpiece—now let’s make it a feast! I always serve my sushi with little dishes of soy sauce for dipping (tip: pour just a little at a time to avoid waste). Don’t forget the wasabi for that signature kick—start small unless you’re brave! Pickled ginger is a must for cleansing your palate between bites. And honestly? A steaming bowl of miso soup or some edamame sprinkled with sea salt turns it into such a satisfying meal. Sometimes I’ll even do a simple cucumber salad with rice vinegar for extra crunch. Now dig in!
Storing and Reheating Sushi
Okay, let’s be real—leftover sushi is rare in my house (it’s too delicious!), but if you somehow have extra, here’s how to keep it fresh. Wrap each roll tightly in plastic wrap and refrigerate for up to 24 hours max—the rice gets hard after that. Pro tip: Store rolls whole and slice just before eating to prevent drying out. Never microwave sushi—the rice turns rubbery! If you must revive it, let it come to room temperature naturally. Honestly? It’s best eaten fresh, so invite friends over and make it a party!
Nutritional Information for Sushi
Here’s the scoop on what’s in your homemade sushi (per roll, based on my recipe): about 290 calories, with 12g protein from that fresh fish, 45g carbs from the rice, and 7g healthy fats mostly from the avocado. Of course, these numbers can change depending on your fillings—more fish means more protein, extra avocado ups the good fats. But honestly? When something tastes this good, I try not to overthink the numbers!
Frequently Asked Questions About Sushi
I get asked sushi questions all the time—here are the ones that pop up most often from my friends (and my own early fails!):
Can I use regular rice instead of sushi rice?
Technically yes, but the texture won’t be right. Sushi rice has that perfect sticky-but-not-gummy quality. If you’re desperate, short-grain is your best substitute.
What if I can’t find nori sheets?
Try soy paper wraps—they’re easier to handle and come in fun colors! Or make “inside-out” rolls with rice on the outside.
Help! My rice is too sticky!
Ah, been there! Wet your hands before handling rice, and don’t pack it too tightly on the nori. A little rice vinegar on your fingers helps too.
Is supermarket fish okay?
Only if it’s labeled “sushi-grade.” Otherwise, play it safe with cooked fillings or veggies until you find a good fishmonger.
Why does my roll fall apart?
Probably too much filling or not enough rice at the sealing edge. Leave that 1-inch bare nori space—it’s your glue!
Can I make sushi ahead of time?
Best eaten within a few hours, but you can prep ingredients ahead and assemble last-minute. Stored rolls get soggy fast.
What’s the easiest roll for beginners?
California rolls (rice-outside) or simple cucumber rolls. Fewer ingredients mean fewer things to go wrong!

Effortless 4-Step Sushi That Melts in Your Mouth
- Total Time: 50 mins
- Yield: 4 rolls 1x
- Diet: Low Calorie
Description
A simple recipe for making sushi at home.
Ingredients
- 2 cups sushi rice
- 2 cups water
- 1/4 cup rice vinegar
- 1 tbsp sugar
- 1 tsp salt
- 4 sheets nori
- 1 avocado, sliced
- 1 cucumber, julienned
- 200g fresh salmon or tuna, sliced
- 1 tbsp wasabi
- 1/4 cup soy sauce
Instructions
- Rinse the sushi rice until water runs clear.
- Cook rice with water in a rice cooker or pot.
- Mix rice vinegar, sugar, and salt in a small bowl.
- Fold the vinegar mixture into the cooked rice.
- Place a nori sheet on a bamboo mat.
- Spread rice evenly over the nori.
- Add avocado, cucumber, and fish slices.
- Roll tightly using the bamboo mat.
- Slice into pieces with a sharp knife.
- Serve with wasabi and soy sauce.
Notes
- Use fresh fish for best results.
- Keep hands wet when handling rice.
- Slice rolls gently to avoid squashing.
- Prep Time: 30 mins
- Cook Time: 20 mins
- Category: Main Dish
- Method: Rolling
- Cuisine: Japanese
Nutrition
- Serving Size: 1 roll
- Calories: 290
- Sugar: 2g
- Sodium: 420mg
- Fat: 7g
- Saturated Fat: 1g
- Unsaturated Fat: 5g
- Trans Fat: 0g
- Carbohydrates: 45g
- Fiber: 3g
- Protein: 12g
- Cholesterol: 20mg
Keywords: sushi, homemade, Japanese, fish, rice