
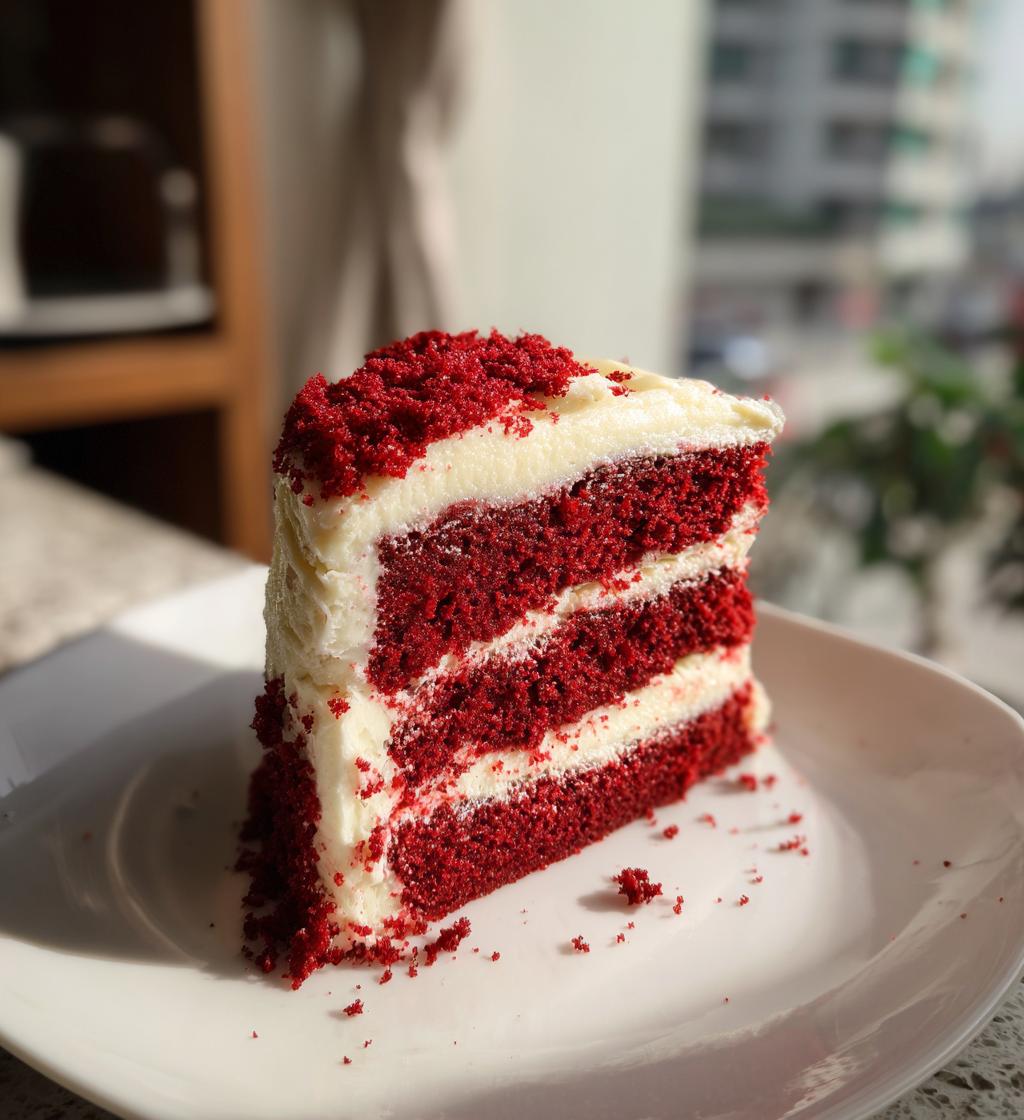
Oh, red velvet cake—where do I even start? That deep red crumb, the hint of cocoa, the way it practically melts in your mouth…it’s pure magic. I remember the first time I made one for a friend’s birthday—the way everyone’s eyes lit up when I brought it out! There’s just something about that vibrant color and rich, slightly tangy flavor that makes it feel extra special. Whether it’s for a holiday, a celebration, or just because you deserve something sweet, this classic red velvet cake never fails to impress. Trust me, once you try this version, you’ll understand why it’s been a favorite for generations.
Why You’ll Love This Red Velvet Cake
- That gorgeous red color—it’s a showstopper every time
- Perfectly moist and tender crumb (no dry cake here!)
- Just the right balance of cocoa and vanilla flavors
- Easy to make with simple ingredients you probably have already
- Pairs beautifully with cream cheese frosting (my personal weakness)
- Always gets “wow” reactions at parties and potlucks
- The vinegar and buttermilk combo gives it that classic tang
- Bakes up evenly every time when you follow my tips
- Makes your kitchen smell absolutely heavenly
- Leftovers? Ha—like that’ll ever happen!
Red Velvet Cake Ingredients
(Tip: Measure everything before you start—it makes the process so much smoother!)
- 2 1/2 cups all-purpose flour (spooned & leveled, not packed)
- 1 1/2 cups granulated sugar (I sometimes use 1 1/4 cups if I want it less sweet)
- 1 tsp baking soda (make sure it’s fresh!)
- 1 tsp cocoa powder (just enough for that signature hint of chocolate)
- 1 tsp salt (balances all the sweetness perfectly)
- 2 large eggs (room temperature—they blend better)
- 1 1/2 cups vegetable oil (or melted coconut oil for a slight twist)
- 1 cup buttermilk (no buttermilk? Mix 1 cup milk + 1 tbsp lemon juice, let sit 5 mins)
- 2 tbsp red food coloring (gel gives the richest color—liquid works too, but you’ll need more)
- 1 tsp vanilla extract (the good stuff, please!)
- 1 tsp white vinegar (sounds weird, but it’s the secret to that perfect texture)
See? Nothing fancy—just pantry staples that come together for something magical. Now let’s bake!
How to Make Red Velvet Cake
Okay, let’s get baking! This comes together so easily—just follow these simple steps for that perfect velvety texture we’re after. (And don’t skip the vinegar—I promise it’s not a typo!)
Step 1: Prep the Pans and Dry Ingredients
First things first: Preheat that oven to 350°F (175°C). While it heats up, grease your cake pans really well—I like to use butter and a dusting of flour, but baking spray works too. In a big bowl, whisk together the flour, sugar, baking soda, cocoa powder, and salt. Get out any lumps now—it’ll save you mixing later!
Step 2: Mix Wet Ingredients
In another bowl (or your stand mixer), beat the eggs lightly. Then pour in the oil, buttermilk, food coloring, vanilla, and vinegar. Mix until it’s all smooth and that gorgeous red color is totally even. Warning: This will stain spoons (and possibly your fingers) temporarily!
Step 3: Combine and Bake
Now, pour the wet ingredients into the dry ingredients. Gently fold them together—don’t overmix! Just stir until no flour streaks remain. Divide the batter evenly between your prepared pans (I use a kitchen scale for precision). Bake for 25-30 minutes until a toothpick comes out clean and the tops spring back when lightly pressed.
Step 4: Cool and Frost
Let the cakes cool in their pans for 10 minutes—this helps prevent sticking. Then transfer them to wire racks to cool completely. And here’s the hard part: wait until they’re totally cool before frosting! Warm cake = melty frosting disaster. Patience pays off, I promise.
Tips for the Best Red Velvet Cake
Want that bakery-quality red velvet every time? Here are my tried-and-true secrets:
- Gel food coloring gives the richest red—liquid can make the batter too thin
- Room temperature eggs and buttermilk mix in smoother (take them out 30 mins early)
- Don’t overmix the batter—just until combined for that perfect tender crumb
- Let the cakes cool completely—frosting warm layers is a slippery mess!
- For extra moisture, brush cooled layers with simple syrup before frosting
- Always sift the cocoa powder—it tends to clump
- If the color looks orangey after baking, add a touch more food coloring next time
Follow these, and you’ll have the most gorgeous, velvety cake that’ll steal the show!
Red Velvet Cake Variations
Want to mix things up? Here are my favorite ways to play with this classic:
- Cream cheese frosting is the classic pairing, but try whipped mascarpone for something extra luscious
- Add 1 tsp espresso powder to deepen the chocolate flavor (don’t worry, it won’t taste like coffee!)
- Swap the vanilla for almond extract (just 1/2 tsp—it’s strong!) for a subtle nutty twist
- Fold in 1/2 cup mini chocolate chips for extra texture and chocolatey goodness
- Make cupcakes! Just reduce baking time to 18-20 minutes
- Try a coconut version—use coconut oil and top with toasted coconut flakes
Really, the sky’s the limit—have fun with it!
Serving and Storing Red Velvet Cake
Here’s the best way to enjoy (and preserve) your masterpiece: I always serve red velvet cake slightly chilled—it makes the texture extra dreamy with cream cheese frosting. Leftovers? Ha! But if by some miracle there are any, store them in an airtight container in the fridge for up to 3 days. The flavors actually get better on day two! For longer storage, wrap unfrosted layers tightly in plastic and freeze for up to 2 months—just thaw overnight in the fridge before frosting.
Red Velvet Cake FAQs
Can I use natural food coloring instead?
Yes, but it won’t be as vibrant. Beet powder works (about 2 tbsp), but the color turns more maroon after baking. For that classic bright red, gel food coloring is still your best bet.
Why vinegar in a cake?!
I know, it sounds nuts! But that teaspoon reacts with the baking soda to give the cake its signature fluffy texture and slight tang. Don’t skip it—you won’t taste vinegar, I promise!
Can I make this without buttermilk?
Absolutely! For every 1 cup buttermilk, mix 1 cup milk with 1 tbsp lemon juice or vinegar. Let it sit 5 minutes until slightly curdled. Yogurt thinned with milk works too.
Why is my cake more brown than red?
Ovens vary—if yours runs hot, the edges might brown. Try lowering the temp to 325°F and baking longer. Also, gel coloring holds up better than liquid.
Can I freeze red velvet cake?
Yes! Wrap unfrosted layers tightly in plastic, then foil. Freeze up to 2 months. Thaw in the fridge overnight before frosting—it’ll taste freshly baked!
Red Velvet Cake Nutritional Info
Here’s the scoop on what’s in each slice (based on 12 servings):
- Calories: 350
- Fat: 18g (3g saturated)
- Carbs: 45g
- Protein: 4g
- Sugar: 25g
- Sodium: 300mg
Remember—these are estimates! Actual values can vary based on ingredient brands, frosting choices, and how generously you slice. Want it lighter? Try reducing sugar by 1/4 cup or swapping half the oil with applesauce.
Your Turn to Bake!
Alright, now it’s your turn! Whip up this red velvet cake and let me know how it goes—did you stick with classic cream cheese frosting or try a fun twist? Snap a photo of your gorgeous creation and share it in the comments below! I love seeing your baking wins (and let’s be real, even the “oops” moments make great stories). Happy baking, and may your cake be as vibrant as your personality!
Print
Irresistible 2-Layer Red Velvet Cake Recipe You’ll Crave
- Total Time: 50 minutes
- Yield: 12 servings 1x
- Diet: Vegetarian
Description
A classic red velvet cake with rich flavor and vibrant color.
Ingredients
- 2 1/2 cups all-purpose flour
- 1 1/2 cups granulated sugar
- 1 tsp baking soda
- 1 tsp cocoa powder
- 1 tsp salt
- 2 large eggs
- 1 1/2 cups vegetable oil
- 1 cup buttermilk
- 2 tbsp red food coloring
- 1 tsp vanilla extract
- 1 tsp white vinegar
Instructions
- Preheat oven to 350°F (175°C). Grease and flour two 9-inch cake pans.
- Whisk flour, sugar, baking soda, cocoa powder, and salt in a bowl.
- Beat eggs, oil, buttermilk, food coloring, vanilla, and vinegar in another bowl.
- Mix wet and dry ingredients until smooth.
- Divide batter evenly between pans.
- Bake for 25-30 minutes or until a toothpick comes out clean.
- Cool cakes in pans for 10 minutes, then transfer to a wire rack.
Notes
- Use gel food coloring for deeper color.
- Let cakes cool completely before frosting.
- Prep Time: 20 minutes
- Cook Time: 30 minutes
- Category: Dessert
- Method: Baking
- Cuisine: American
Nutrition
- Serving Size: 1 slice
- Calories: 350
- Sugar: 25g
- Sodium: 300mg
- Fat: 18g
- Saturated Fat: 3g
- Unsaturated Fat: 12g
- Trans Fat: 0g
- Carbohydrates: 45g
- Fiber: 1g
- Protein: 4g
- Cholesterol: 35mg
Keywords: red velvet cake, dessert, baking, homemade cake